
Complete Fish and Creature List
| Creature | Type | Island | Bait or lure |
|---|---|---|---|
| Brown Crab | Normal | 1 | Free Lure |
| Shrimp | Normal | 1 | Free Lure |
| Rock Crab | Normal | 1 | Hotdog |
| Lobster | Normal | 1 | Hotdog |
| Piranha | Normal | 2 | Beginner Lure or Hotdog |
| Gar | Normal | 2 | Free Lure |
| Mackerel | Normal | 2 | Free Lure |
| Cod | Normal | 2 | Beginner Lure |
| Goby | Normal | 2 | Beginner Lure |
| Pike | Normal | 2 | Free Lure |
| Perch | Normal | 2 | Beginner Lure |
| Triggerfish | Normal | 2 | Beginner Lure |
| Goldfish | Normal | 2 | Beginner Lure |
| Salmon | Normal | 3 | Beginner Lure |
| Catfish | Normal | 3 | Standard Lure |
| Clownfish | Normal | 3 | Standard Lure |
| Sea Urchin | Normal | 3 | Standard Lure |
| Yellow Boxfish | Normal | 3 | Standard Lure |
| Needlefish | Endangered | 3 | Standard Lure |
| Angelfish | Normal | 3 | Standard Lure |
| Bluegill | Normal | 3 | Standard Lure |
| Seahorse | Endangered | 3 | Standard Lure |
| Bowlfish | Endangered | 3 | Standard Lure |
| Bass | Normal | 4 | Professional Lure |
| Eel | Normal | 4 | Professional Lure |
| Red Snapper | Normal | 4 | Professional Lure |
| Sengarat | Normal | 4 | Professional Lure |
| Halibut | Normal | 4 | Professional Lure |
| Tigerfish | Normal | 4 | Professional Lure |
| Flying Fish | Normal | 4 | Professional Lure |
| Voxelfish | Normal | 4 | Professional Lure |
| Parrotfish | Normal | 4 | Professional Lure |
| Dripper | Normal | 4 | Professional Lure |
| Blobfish | Normal | 5 | Scientific Lure |
| Oarfish | Normal | 5 | Scientific Lure |
| Anglerfish | Normal | 5 | Scientific Lure |
| Stonefish | Normal | 5 | Scientific Lure |
| Superdwarf Fish | Normal | 5 | Scientific Lure |
| Sunfish | Boss fish | 2 | Beginner Boss Lure |
| The Old Pike | Boss fish | 2 | Beginner Boss Lure |
| Blue Shark | Boss fish | 3 | Standard Boss Lure |
| Tuna | Boss fish | 4 | Professional Boss Lure |
| Goblin Shark | Boss fish | 5 | Scientific Boss Lure |
| Bowhead Whale | Boss / story | 5 | Fish Bucket |
| Spider Crab | Story boss | 1 | Empty Beer Can |
| Giant Piranha | Story boss | 2 | Modified Leech |
| Pufferfish | Story boss | 3 | Carrot |
| Albatross | Story boss | 4 | Tuna |
| Mutated Bowhead Whale | Story boss | 5 | Bowhead Whale |
This table follows Game8’s 49-entry list and checks island-and-bait pairings against the G2A island guide and the collector source. “Fish” is used broadly because the encyclopedia includes crabs, shrimp, a sea urchin, bosses, and an Albatross. Sale values are separated into the fish prices page so this hub stays focused on finding and catching each entry.
Fish by Island
Island 1 uses the Crab Fishing Rod and introduces a very small pool: Brown Crab, Shrimp, Rock Crab, and Lobster. The Free Lure covers the first two, while Hotdog targets Rock Crab and Lobster. Spider Crab is separate from this ordinary pool and needs the quest-specific Empty Beer Can.
Island 2 expands the collection with common freshwater-looking fish and the Beginner lure tier. It also has Sunfish and The Old Pike as optional boss catches, plus the story-critical Giant Piranha. If your encyclopedia has a gap early in the list, compare Free Lure, Hotdog, and Beginner Lure before moving on.
Island 3 is the first place where collection and progression directly intersect. Needlefish, Seahorse, and Bowlfish are endangered creatures; one of them can be traded to the Tourist for the Carrot used on Pufferfish. Preserve the first endangered catch until that quest is complete.
Island 4 has the largest ordinary group in the verified table and is centered on the Professional Lure. Tuna needs the Professional Boss Lure, and its body then becomes the bait for Albatross. Island 5 moves to Scientific lures and contains the most demanding optional and story bosses.
How to Catch a Creature Successfully
Equip the relevant rod and bait, cast toward the water, and reel in after the catch indicator appears. Once the creature reaches land, drop it by changing or unequipping the held item, then attack before it escapes. Ordinary catches can be surprisingly fast, so choose open ground away from the shoreline.
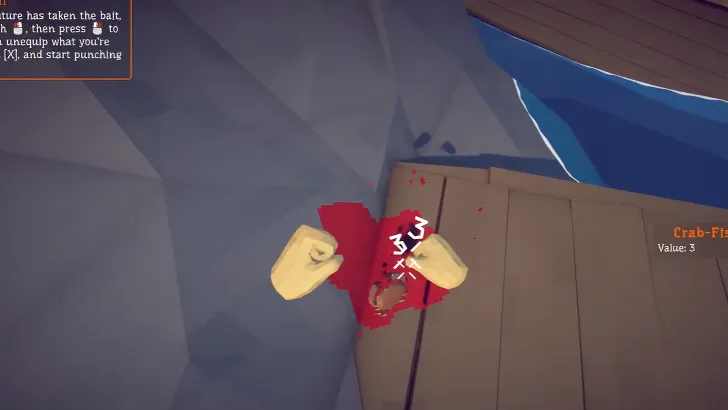
After the creature is defeated, decide whether it is money, food, a collection entry, or a quest component. Selling everything blindly breaks later chains: Tuna summons Albatross, and Bowhead Whale must be carried to the Volcano. The bait list explains every special handoff.
Boss Fish and Story Bosses
Boss lures pull stronger optional creatures such as Sunfish, Blue Shark, Tuna, and Goblin Shark. Story bosses use unique quest items and often unlock a new island after their trophy is returned. The all bosses guide separates required fights from optional catches and lists the route in order.
Do not assume every large catch is safe to sell. The video transcripts repeatedly show players considering or actually disposing of a creature before discovering its next use. When the active quest mentions a fish, place it somewhere safe and finish the handoff before returning to the normal money loop.
Rare and Drip Variants
Drip creatures are special versions tracked separately from the ordinary encyclopedia. The multiplayer completion transcript describes them as shiny-style variants and shows that they interact with the Reel of Fortune, but it also demonstrates why appearance alone is not a reliable naming system. Inspect the collection entry and use the dedicated rare variants guide before selling or gambling an unusual catch.
The local rare-variant sources warn that rare variants, Drip creatures, endangered fish, and story bosses are related collection concerns but not interchangeable labels. Keep a simple checklist by island and record the normal and Drip sides separately. That prevents repeated fishing on the wrong island after the ordinary list is already complete.
Collection Route
Complete ordinary entries as you progress instead of postponing the entire encyclopedia until Volcano. Island-specific lure tiers naturally restrict the pool, making early gaps easier to identify while you are still nearby. Keep the necessary rod, cycle the supported baits, and move only after the island’s ordinary list is filled or intentionally deferred.
For the final clean-up, compare your missing entry with the table rather than casting every lure everywhere. A missing Eel, for example, points directly to Island 4 and Professional Lure; a missing Goblin Shark points to Island 5 and Scientific Boss Lure. This targeted method also protects your money because you are buying only the bait tier that can produce the missing creature.
Related Guides
Use fish prices when your goal is income, rare variants for the second collection track, and all islands when you have not unlocked the required location. Players stuck on a quest catch should check all baits before assuming the creature is random or unavailable. Each page keeps one task separate so the full creature table remains easy to scan.